Hello everyone, welcome back.
In Today’s post, we will be creating a simple ice freeze effect on our camera lens and this will also serve to be an entry point on how to go about full screen shader in Godot.
Intro
For this, I will be using Godot 4.1, I have a nice little scene setup. Also I will be using an addon called Shader-lib, which is created by none other than yours truly, which will add some dozen and a half extra nodes for visual shader.
So go to asset library, search for Shader-lib, and just hit the download.
After importing the addon, If you don’t see additional nodes in visual shader, just go to Project > Reload current project.
It’s not like you absolutely need the addon, but still, it will be easier to follow along.
Okay, having said that, let’s get shading!
Setup
First, let’s create a shader, so Create new > Resource > Visual shader. Then, make sure you select the mode Canvas item, then let’s call it freeze_shader.
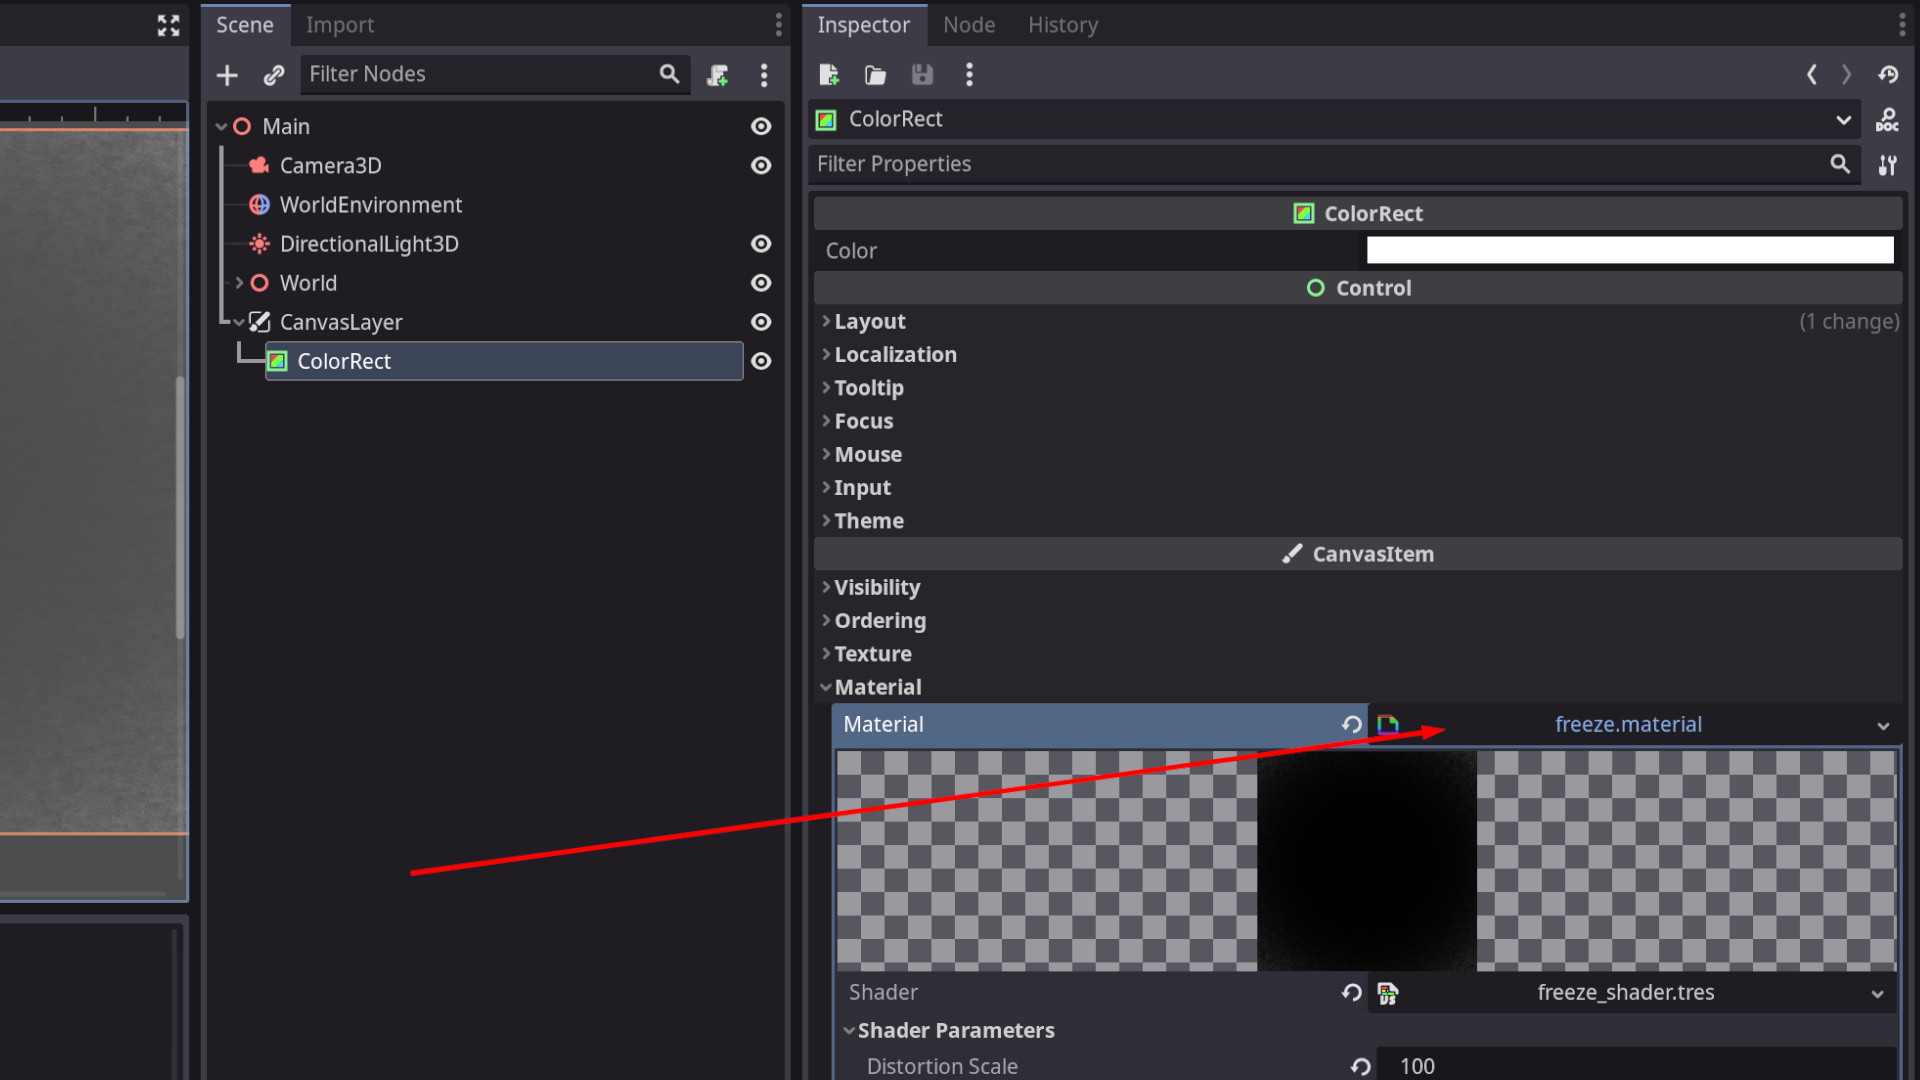
We will also create a material for our shader, so again Create new > Resource > Shader material. I will call it freeze then I like to select the extension .material. Then assign our shader to our material.
Now the question is where do we apply our material?
So let’s create a Canvas layer in our scene, it will add a 2D layer which will render the elements inside of it on top of our scene. Then let’s create a Color rect, in our Canvas layer, and we will apply our material to our Color rect, and set it’s anchors to Full rect.
Visual shader
In our visual shader, go to Fragment processor.
Here, first let’s create a Texture2D node, then in the first dropdown select the Screen. This will give us a screen texture, meaning whatever our camera is seeing will be stored in that texture.
Now for the effect let’s create a SimpleNoise node, it’s a node from the addon which gives us this nice value noise.
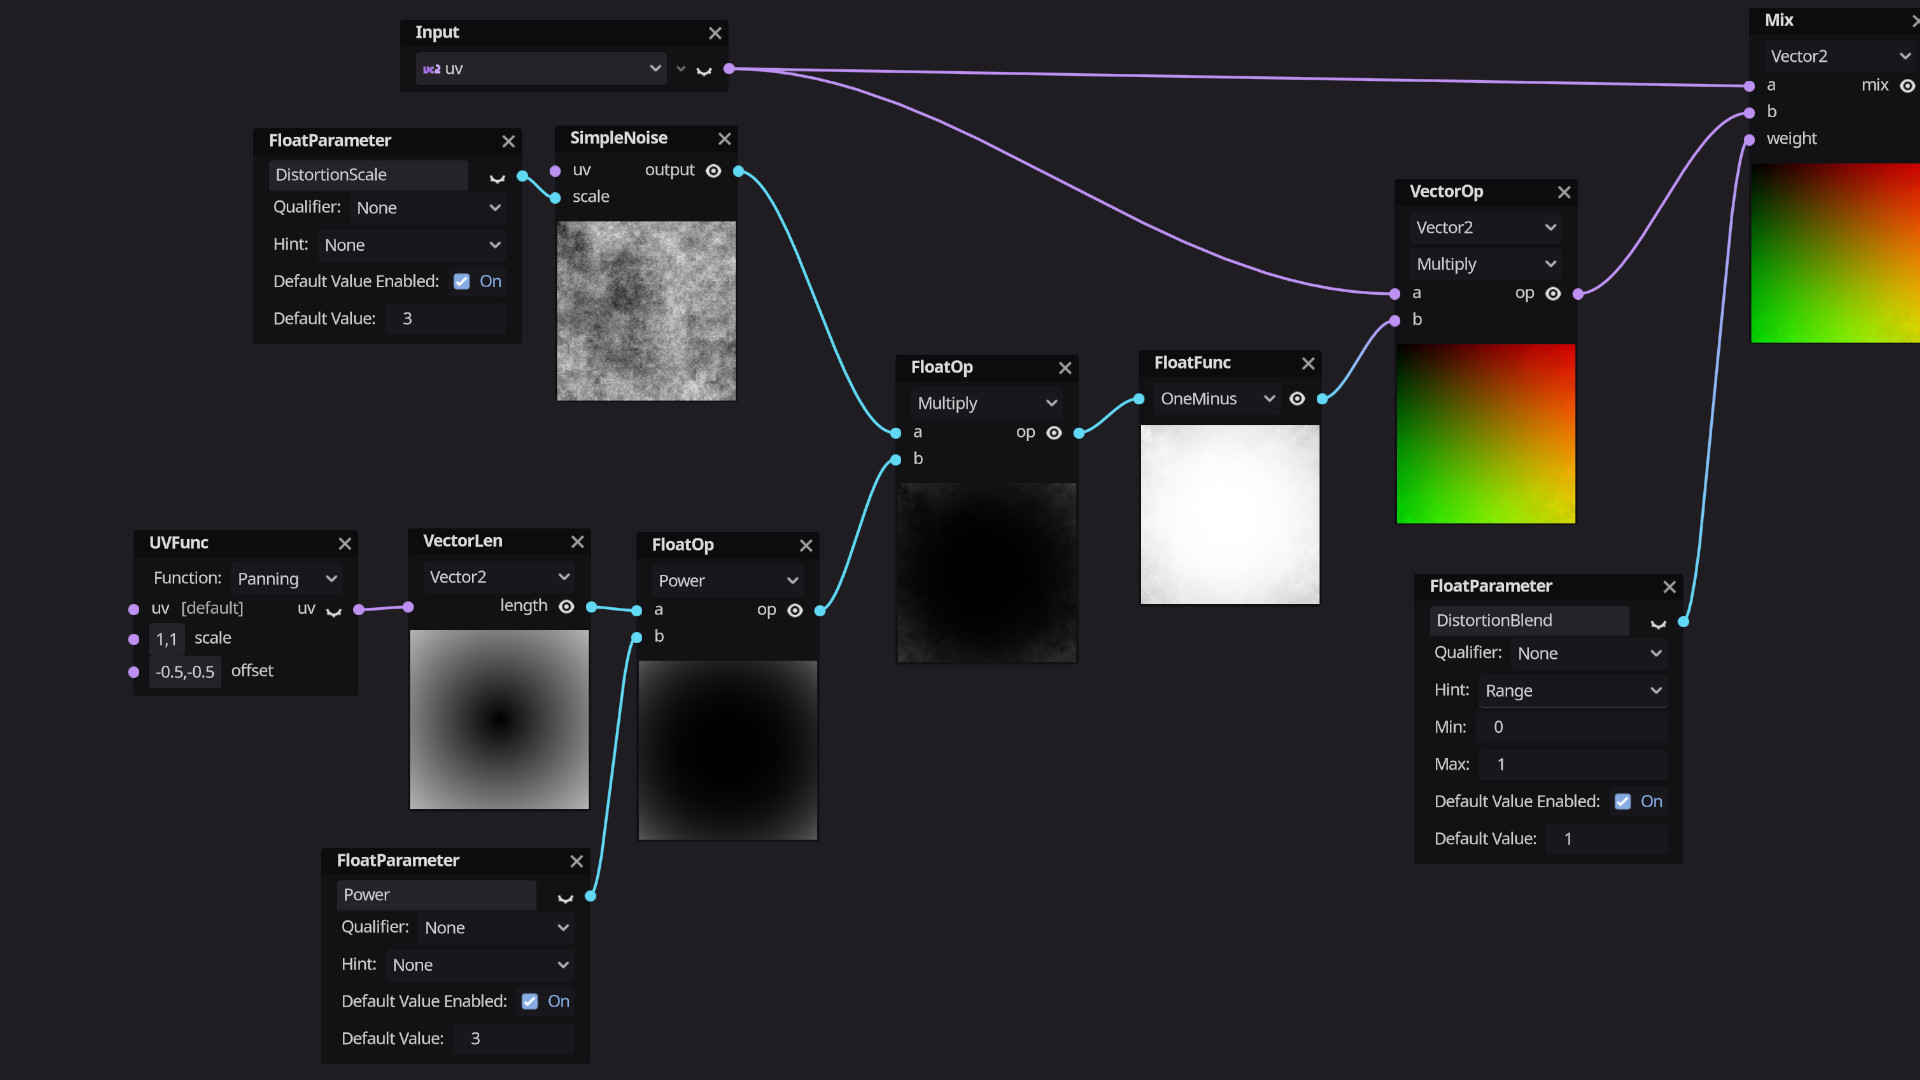
Then we will control this scale from the inspector so, let’s create a FloatParameter, I will call it DistortionScale, allow the default value and set it to 3. Take its output and feed it into Scale.
We will use our SimpleNoise to distort the UVs of our texture so let’s grab the UVs first. Take Input node’s output and feed it into a Mix node. Make sure you have selected the Vector2 because well UVs are Vector2.
Then take our SimpleNoise node’s output and feed it into input B of our Mix node.
Then we would like to control this Weight from the inspector, so let’s create a FloatParameter, I will call it DistortionBlend, Give a default value of 0.2, also set its hint to Range, with minimum value 0 and maximum 1, so basically we clamped the value between 0 and 1.
Now what Mix node does is, it linearly interpolates between input A and B based on the Weight which has a valid range between 0 to 1. If we feed 0 into weight It will return A, if we feed 1, it will return B if we feed 0.5 it will return 50% from A and 50% from B and so on.
Then take our Mix nodes output and feed it into the UV of our Texture2D node.
Now if I play and adjust our material, we have this nice effect! Which is pretty cool, but this effect can be useful and a render or some sort of transition but it’s not useful at all in actual gameplay.
So let’s try to make it like vignette, at the edges of our game screen. Now, how can we add a vignette? We could go like let’s subtract our noise from our Ellipse node, which is another handy node from the addon, but the problem is, the values just basically jumps from 0 to 1 and we want more of a smooth vignette.
On way to do it is take the UVFunc node with mode Panning, set the offset to -0.5, -0.5. Take its output and feed it into VectorLen node which basically return length of a vector, and UVs are Vector2 so keep the mode as Vector2.
And we have this nice fade, and to control the fade strength, we will take our length and feed it into Power node. Well actually it’s a FloatOp node with the mode Power.
Then we will create another FloatParameter, call it Power, give a default value of 3 and feed it into Input B.
Now, how do we combine our vignette with our noise? Try to guess it.
Well, we will just multiply these two. Make sure you select FloatOp.
Now, we can just take our Multiply node’s output and feed it to the Mix node right? Well no, life is not that easy, See what happens if we feed 1 to our Weight.
We are getting nice distortion of UVs at the edges, but the center is completely black, which will lead to some weird effect, instead of that black parts, we want actual undistorted UVs.
Now I won’t tell you to guess this one because its slightly complicated. So take our Multiply’s output and feed it into One minus node. And one minus as the name suggests, subtracts any value we feed in with 1.
In our case it will just flip the colors, we will get black where it’s white and vice versa. Then we will multiply One minus with our UVs. This time make sure you have selected VectorOp with Vector2 selected.
What we are doing here is, we are distorting the UVs at the edges but keeping the same UVs at the center. Then take its output and feed it into input B of our Mix node.
I also like to add some snow at the edges so let’s take our distorted vignette and feed it into another Multiply node. Then let’s create another FloatParameter, call it Intensity, give default value of 1 and feed it into Multiply node.
Finally, let’s add this on top of our texture, You can do that with ColorOp but I like to do it with VectorOp. Then take its output and feed it into the Color.
And we have nice freeze lens effect.
Trouble following along? Check out this detailed tutorial!
Thank you so much for reading!


Comments
Post a Comment